
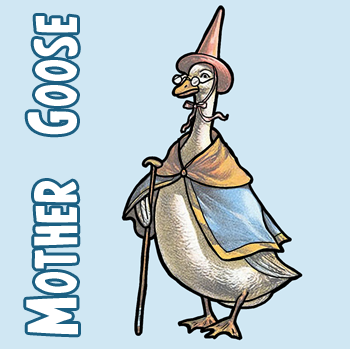
How to Draw Mother Goose with Easy Step by Step Drawing Lesson
Learn how to draw Mother Goose with the following easy-to-follow, step by step instructions. Mother Goose is all embedded in our childhood memories, it is sort of fun to draw such a beloved character. We will guide you thru the simple steps to drawing a beautiful Mother Goose. Have fun!
How to Draw Mother Goose with Simple Step by Step Drawing Tutorial
Step 1

Start off by drawing a #9.
Step 2
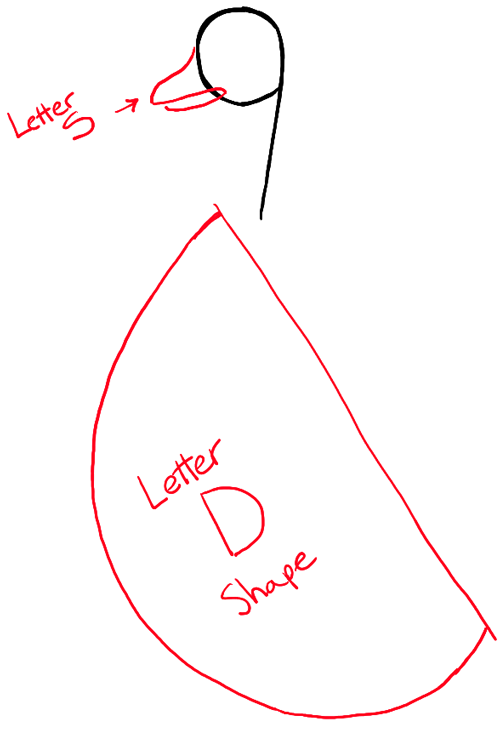
- Draw letter ‘S’ shape for beak.
- Draw letter ‘D’ shape for body.
Step 3
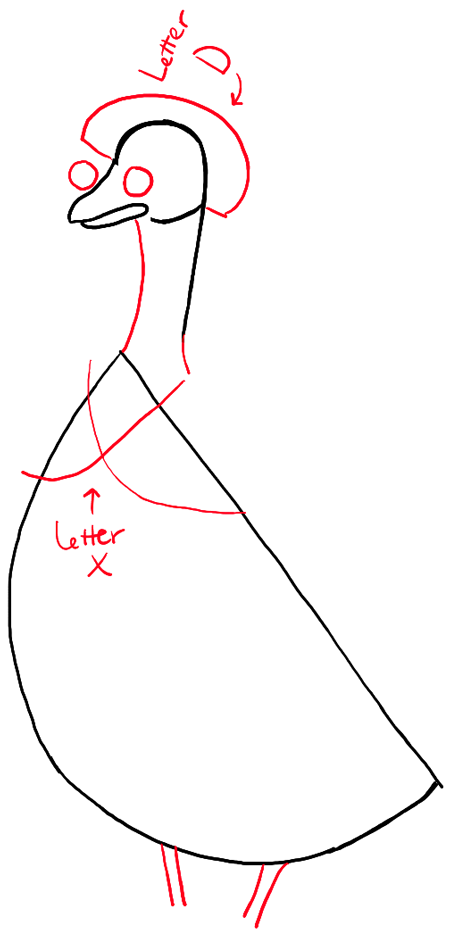
- Draw sideways letter ‘D’ shape for bottom of hat.
- Draw 2 lines for each leg.
- Draw circles for glasses.
- Draw part of neck.
- Draw 2 curved lines over chest, forming a letter ‘x’-like shape.
Step 4
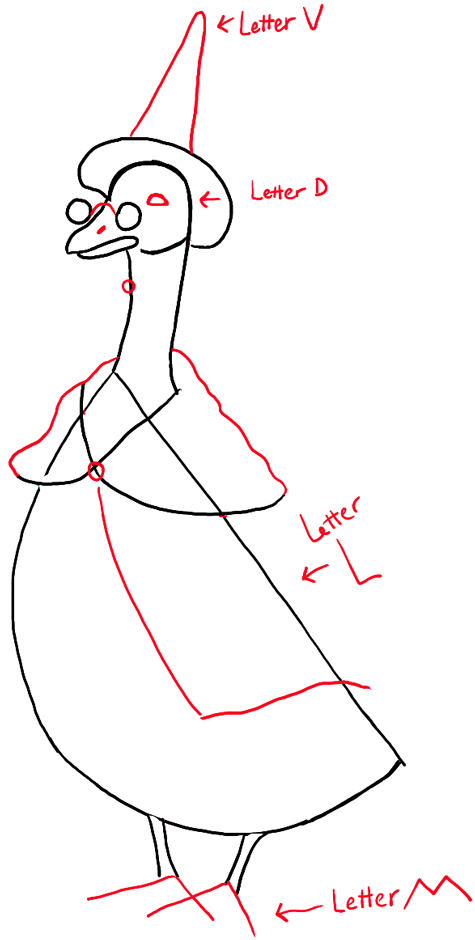
- Draw upside down letter ‘v’ shape for top of hat.
- Draw letter ‘v’ shapes for feet – forming a letter ‘m’ like shape.
- Draw a letter ‘D’ shape for the eye. Draw a curved line for center of glasses.
- Draw part of her shawl.
Step 5

- Finish up glasses and eye.
- Draw a #2-like shape on each foot.
- Draw wings and bottom curve.
- Add a few other details.
Step 6
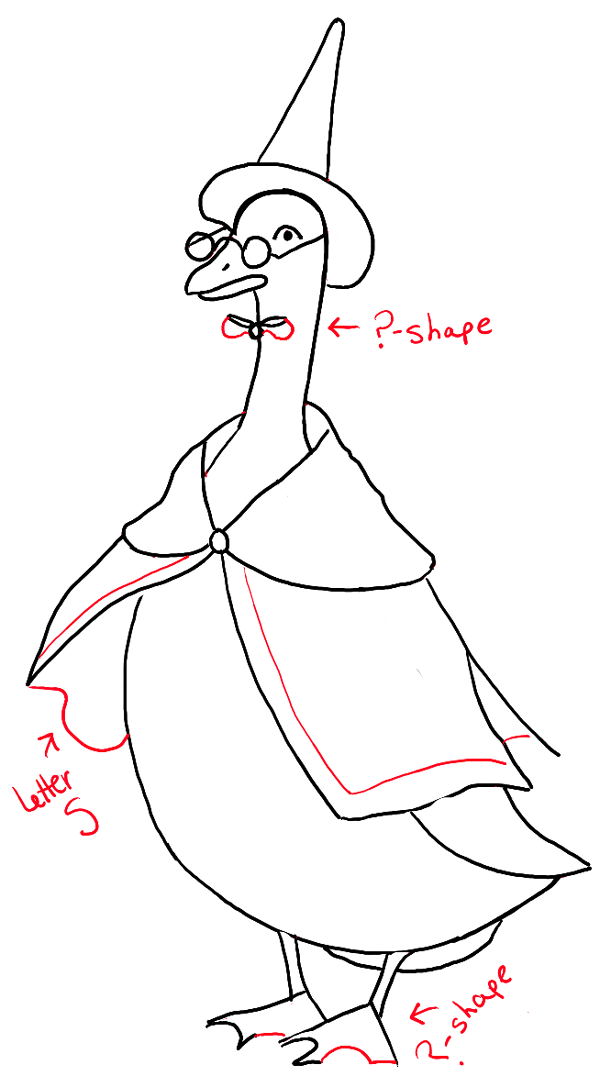
- Finish feet and bow.
- Draw letter ‘S’ shape on left wing.
Step 7
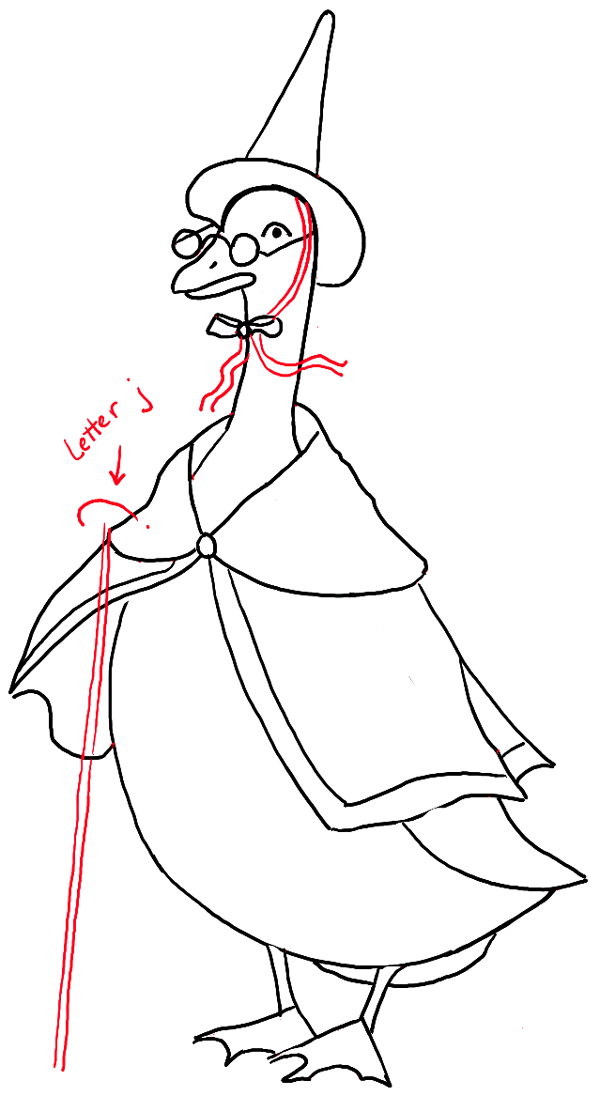
- Draw hat’s ribbon.
- Draw walking stick.
Step 8
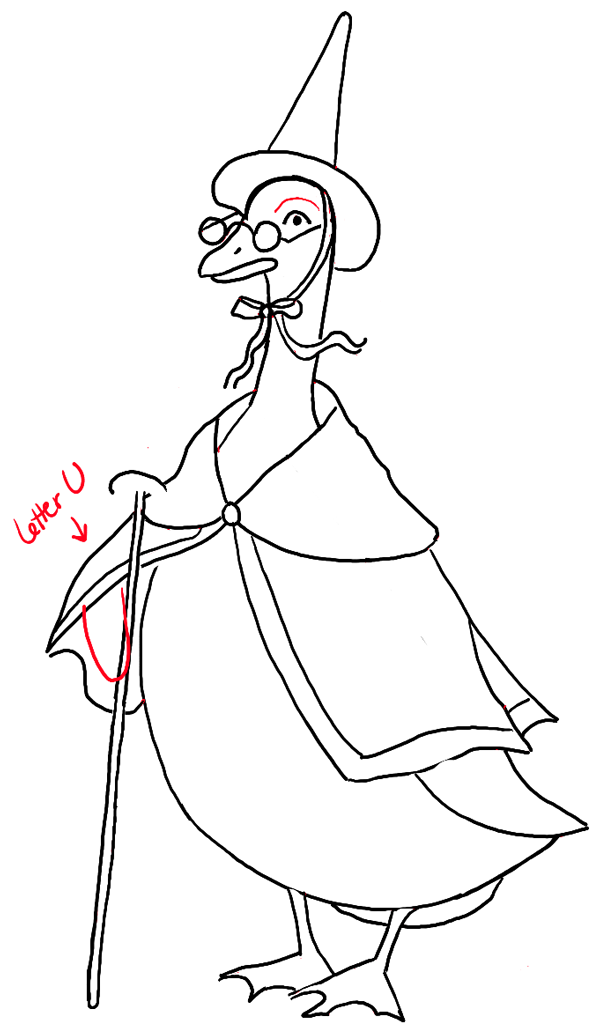
- Draw eye brow and left wing holding walking stick.
Step 9
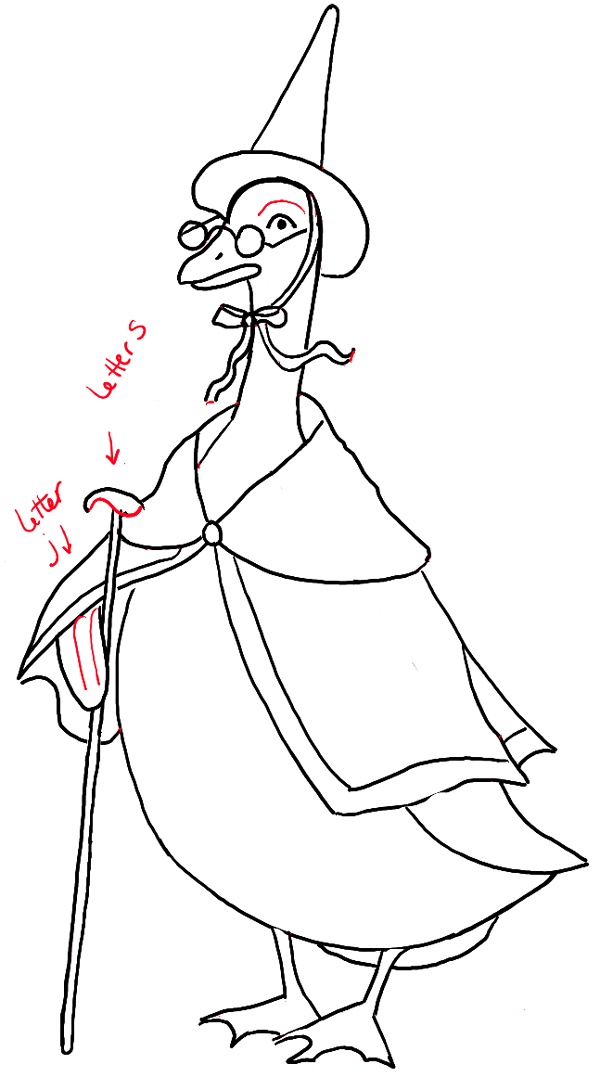
– Finish it all up.
Finished Drawing of Mother Goose

- Erase any remaining guide lines and darken / thicken lines to make it look nice and crisp.
- You can color in Mother Goose if you like.
- Come back soon for more drawing tutorials.

Information
This article was written on 09 Sep 2015, and is filled under Birds, Nursery Rhymes & Fairy Tales.
Current post is tagged
geese, goose, how to draw mother goose, mother goose, nursery rhymes