
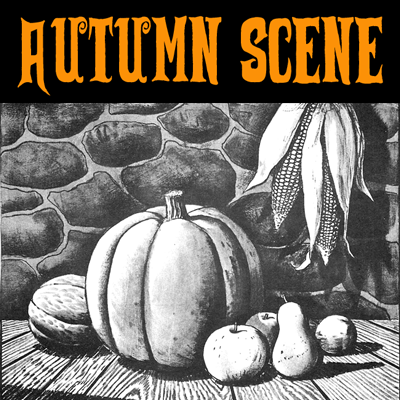
How to Draw an Autumn Still Life Harvest Scene for Thanksgiving and Halloween
This tutorial will teach you how to draw a beautiful Autumn Harvest scene with corn, pumpkins, apples, and pears. This would be a fun project to draw for Thanksgiving or Halloween. And it will teach you basic still life drawing skills as well. This tutorial comes from an old book by John Gnagy. He was a very talented artist and an even better teacher to Americans nationwide. He had his own tv show and was eager to teach others how to draw and paint just like him.
How to Draw an Autumn Still Life Harvest Scene for Thanksgiving and Halloween
Step 1
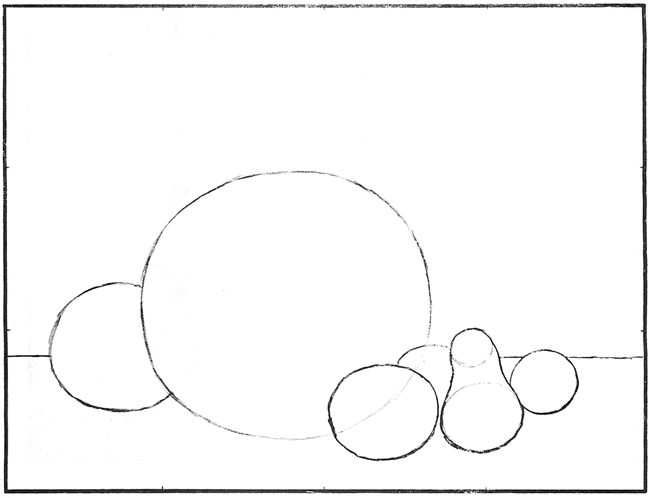
Start your outlines light and sketchy. Draw the circles for the fruits and vegetables with a carbon pencil (but any type of pencil you have will do). The closer the object is to the foreground, the lower you should place it in the frame of your picture. Draw the pear with a small ball form and large ball form connected by an outline. After you have drawn the circles, draw the line for the table top a little below the one-third mark in the picture frame.

Step 2
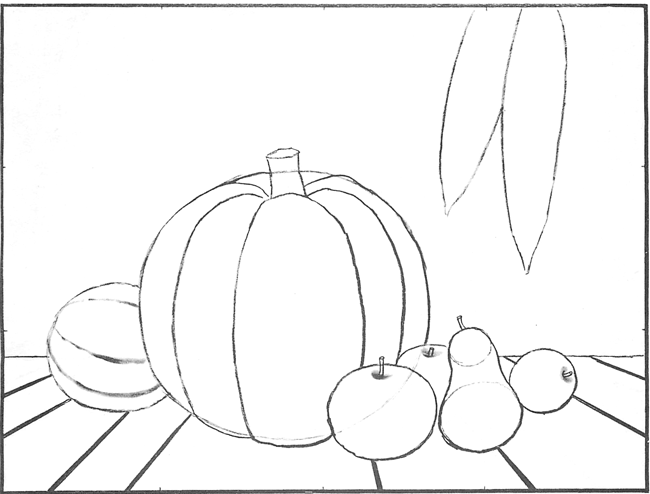
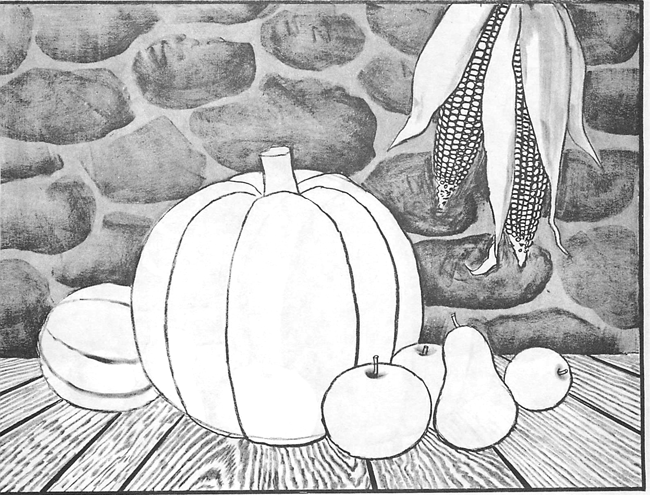
Draw the shapes of the ears of corn on the upper right side of your page. They are cylinders tapering to cones at the ends. The pumpkin stem is a cylinder. Set it into the top of the ball. Now draw the segments of pumpkin and melon. Use the paper stomp (if you have one) for the melon segments which are not as sharp nor deep as the pumpkin’s. Draw a curved line in the top of each apple with the stomp for the cone-like opening into which you draw the stem. Each stem is a cylinder, drawn with the carbon pencil. Place a dot in the very center
of the picture as a vanishing point. Use a ruler or the edge of a book to draw the crevices of the boards converging toward that single vanishing point. Random width boards make the areas more interesting.
If you do have a pencil stump, here is a tip for using it correctly

The paper stomp is a handy tool with many uses. It is merely a roll of special paper, specially made to absorb charcoal, crayon, graphite, chalk, or pastel. First put some chalk on the sandpaper pad, then roll the tapered tip of the stomp into the dust on the sand-pad. Then use the stomp as you would use a sharpened pencil on its side. To shade the opening in the apple simply make a single curved stroke as indicated in the close-up sketch.
Step 3
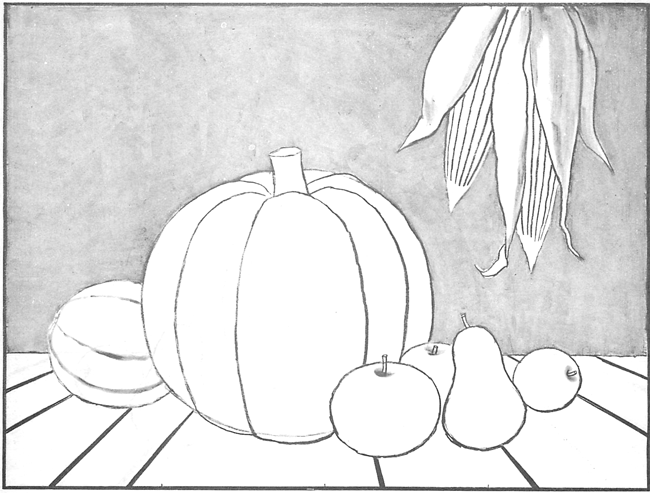
Draw the corn hooks each a little different in size. Wave the lines for a rough irregular effect. With a kneaded eraser, remove the lines that show through the pumpkin stem, apples, corn husks and the circles in the pear. Draw parallel rows of corn on each ear. Break your large light gray chalk into three pieces and use a short piece to tone in the background of the picture. Log the chalk on its side when using it to cover a broad area and smooth the surface. When the background is all covered, blend it with the paper stomp. Now let’s choose the direction of our light. This decision is always up to the person drawing the picture. So lets make the light come from the upper left. This means then that all the shading and cast shadows will be on the right and underside of each object. Use the stomp for shading the right side of the corn husks.
Here is a tip for drawing & shading with chalk correctly
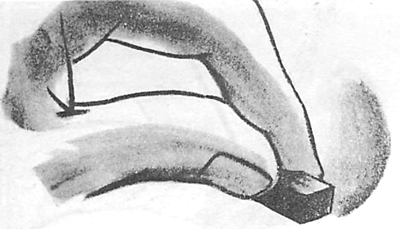
The gray and black chalks can be used with single stroke efficiency for shading the sides of the ball forms of fruit such as the apples, pear, melon, and pumpkin. Firs practice using the chalk flat to make broad curved strokes. Then do the same thing by pressing closer to one end of the chalk as you make the curved stroke. After a little practice, you’ll be toning and shading entire objects in a single stroke. Soon your drawings will have a professional look.
Step 4
The kernels of the corn are small ovals within the parallel lines of the rows. Use the dark gray chalk on its side for toning and shading the stones on the background wall. Turn your drawing sideways and hold the small piece of chalk so that you on give it more pressure at one end. This will help to get the effect of shading on the side of an irregular ball-like form. In this case, shading is on the right and underside of each bulging stone. Draw the wood grain in each board with the corner of the light gray chalk, wiggling it to get variation. Converge the gain of the wood toward the vanishing point. A good look at some actual boards in which the graining is very dear will help you.
Tips for Drawing Shadows of the Fruit / Vegetables on the Wood Grain Floor
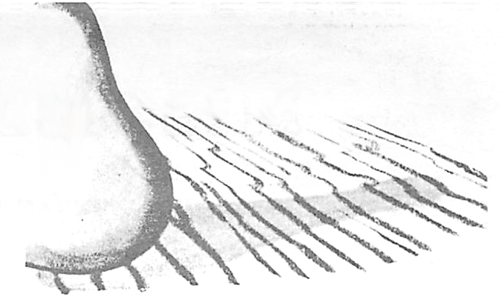
Try as often as possible to make your cast shadows transparent. By transparent, I mean you can see several dark and medium dark tones in the shadow instead of its looking jet black. In the sketch at the right you can see the darker grain of the wood become even darker where it passes through the cast shadow of the pear. This effect of transparent shadows can be gotten by keeping the cast shadow light enough so you can still put darker strokes into it.
Step 5
Use the carbon pencil to doodle an irregular outline around each stone mass. Turn your drawing upside down if you are right handed, so that you can use the gray chalk for quick shading on the right side of each ball form of fruit. putting the pressure on the point of the chalk but allowing a broad tone that is darker at the one edge and gets lighter toward the opposite end of the chalk. If you are left handed you need not turn the drawing around. After you have shaded the aide and under-surface of each form, use the paper stomp to blend and soften the tone at the edge of the shadings and use the stomp to give a little texture to the melon. Shade each kernel of corn with the point of the stomp. With the pencil, cat shadows on the kernels under the edges of the husks, shade the pumpkin stem and give it a stringy texture.
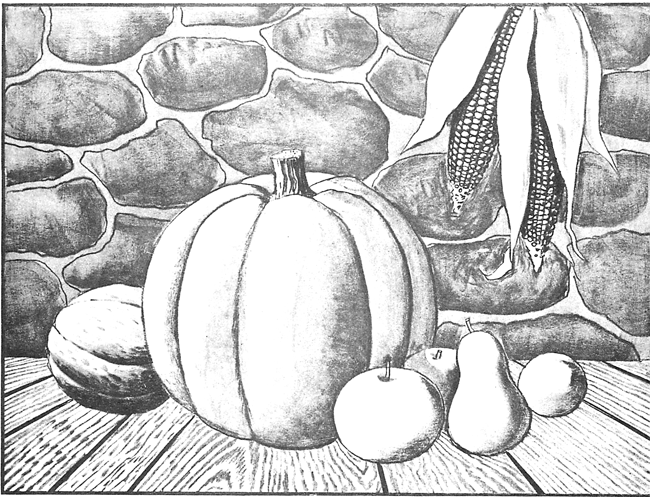
Finished Black and White Drawing of an Autumn Harvest Scene with Pumpkins / Corn, and Fruit
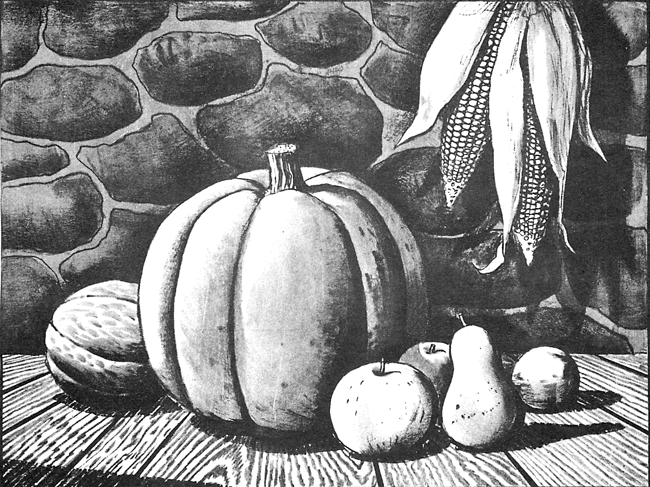
With the carbon pencil cut shadows from the corn, following the contour of the bulging stones in the background. Cast the pumpkin shadow across part of the wall. Cast the shadow of the melon, apples, pear, and pumpkin on the table top. Extend the pear shadow long and narrow. Most of these shadows are elliptical. Cast a shadow on top of the pumpkin from the small cylinder form of the stem. Use the carbon pencil also to put lines of rough texture on the corn husks and Pecks of coloring on the apple, pear, pumpkin stem and stones. Cross-hatch and irregular strokes will help give roughness to the stones. Also, break up the edges of the stones with a few irregular marks. Put dark accents on the shaded side of each object with the black chalk and fuse together the tone of the stones in the background with the stomp.
3 Comments
Leave a Reply
Information
This article was written on 07 Nov 2014, and is filled under Autumn / Fall, Halloween, Stil-Life Drawing, Thanksgiving.
Current post is tagged
autumn, corn, fall, halloween, harvest, pumpkin, pumpkins, thanksgiving

This is a fantastic lesson!! Thanks for posting. Long live John Gnagy! We need more teachers like him to get the youth interested in art.
This is hard mrs wood
This was very hard but I enjoyed it a lot.