
How to Draw Olaf the Snowman from Disneys Frozen Drawing Tutorial
Disney has made a fabulous movie called Frozen in which there is a magically created snowman called Olaf. Olaf is adorable and I decided to make a step by step drawing tutorial to help you draw him too. Have fun!
You Might Also Like Our Other Frozen Drawing Lessons
How to Draw Olaf the Snowman from Disneys Frozen Drawing Tutorial
Step 1
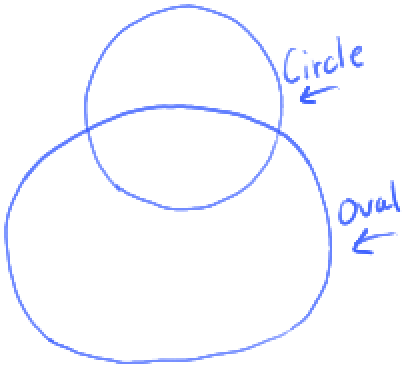
Draw an oval and a circle – to form a #8-like shape.
Step 2
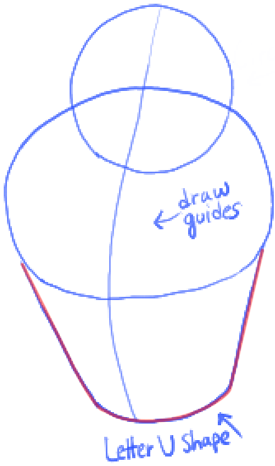
– Draw a letter ‘U’-like shape at the bottom of the face. Draw guidelines thru the face to help place facial features.
Step 3
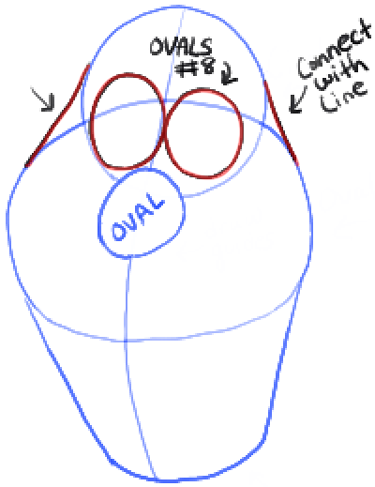
– Draw lines at the side of the face to connect the top circle to the oval.
– Draw 2 ovals for eyes to form a sideways #8 shape.
– Draw an oval nose.
Step 4
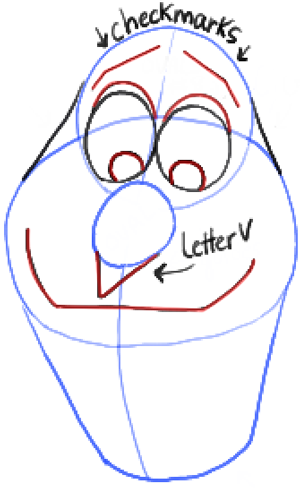
– Draw checkmark shaped eye brows.
– Draw curved lines above the eyes and circles within the eyes.
– Draw a triangle at the end of the nose.
– Draw sideways letter ‘c’ like shape for the mouth.
Step 5
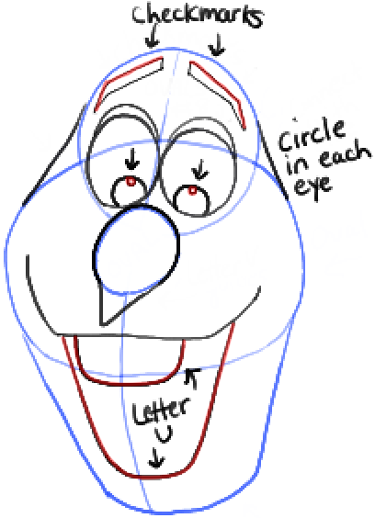
– Finish off the checkmark-shaped eye brows.
– Draw 2 letter ‘U’ shapes for the bottom of the mouth and the teeth.
– Outline the nose guides.
– Draw tiny circles in each eye for the highlights of the eyes.
Step 6
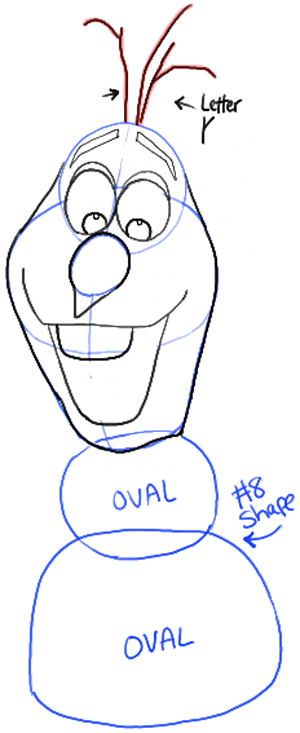
– Draw letter ‘Y’ shapes at the top of the head for twigs…also draw a curved line for one of the twigs.
– Draw 2 ovals for the snowballs that the snowman is made up of – this forms a #8-like shape.
Step 7
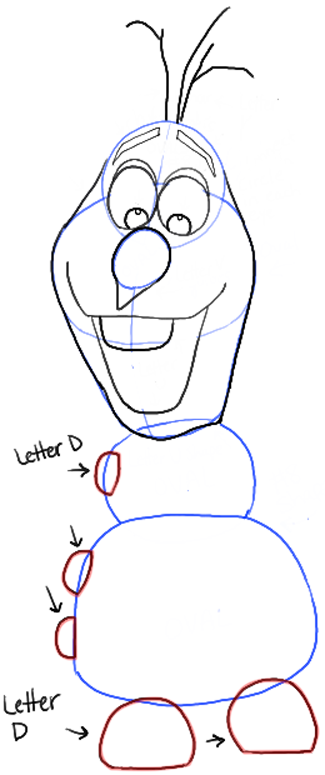
– Draw a few sideways letter ‘D’ shapes for feet and buttons.
Step 8

– Draw stick hands – a line with lines sticking out of it.
– Draw 2 curved lines for the stem of the flower…a flattened oval shape for the leaf…and an oval shape for the stems’ guide.
Step 9
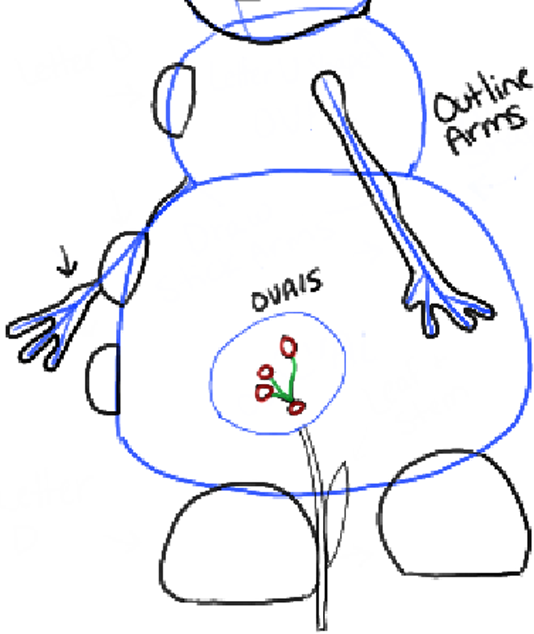
– Outline Olaf’s hands and arms.
– Draw ovals and curved lines within the oval of the flower.
Step 10A
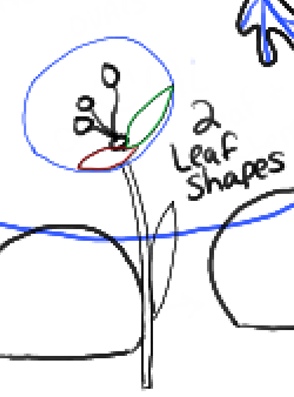
– Draw leaf shaped petals within the oval.
Step 10B
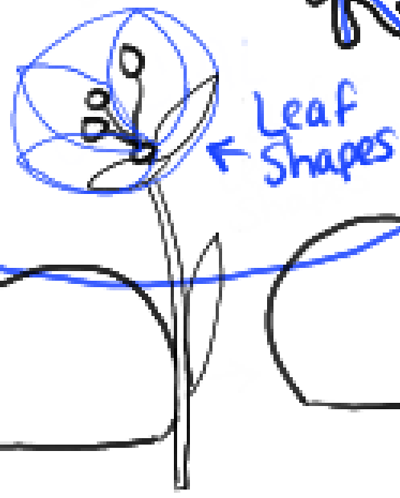
– Draw more leaf-shaped petals within the oval.
Step 10C
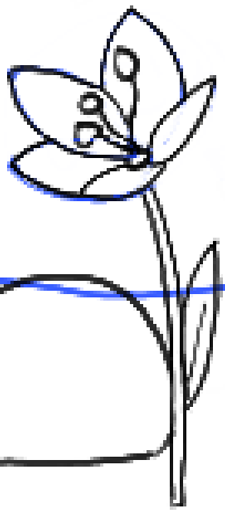
– This is what the flower should look like.
Finished Drawing of Olaf the Snowman Looking at a Spring or Summer Flower
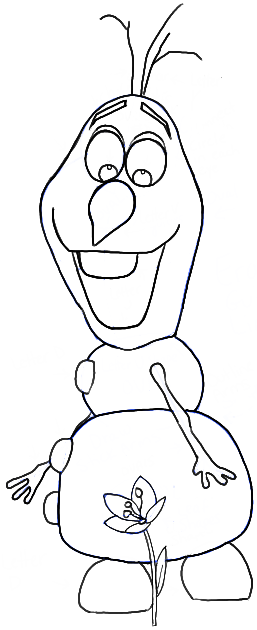
– Now erase the guidelines and darken / thicken the lines that are within the picture.
I hope that your Olaf the Snowman turned out really well…come back for more Frozen Drawing Tutorials as well as many other types of drawing lessons. I hope that you had fun!
You Might Also Like Our Other Frozen Drawing Lessons
8 Comments
Leave a Reply
Information
This article was written on 08 Feb 2014, and is filled under Disney Characters, Disneys Frozen.

Wow this is cool
OMG thanx u for teaching how to draw Olaf ⛄️
The Real Person!
Author admin acts as a real person and passed all tests against spambots. Anti-Spam by CleanTalk.
So glad you liked it!
It’s a bit creepy but cool
THANK U so much for telling us how to draw olaf!!!
Such an awesome tutorial. My olaf turned out great!!!
This is so cool omg Olaf
Mine turned out a little hinkey but it looked pretty good