How to Draw Sherman from Mr. Peabody and Sherman in Easy Steps Tutorial
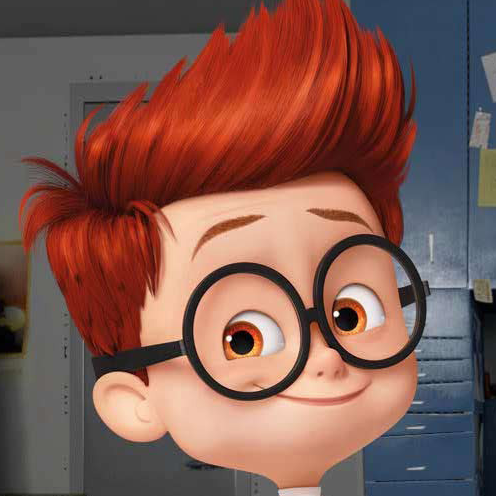
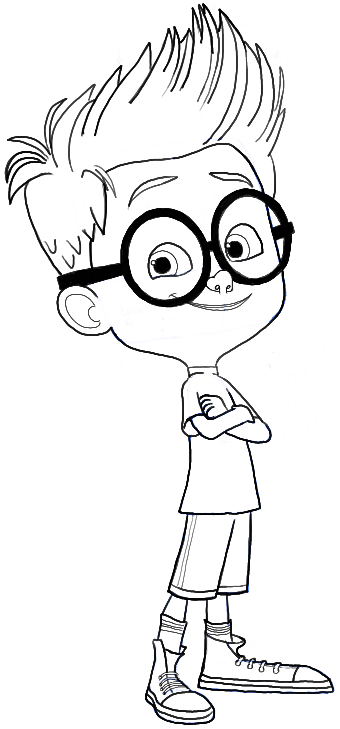
Today I will show you how to draw Sherman from Mr. Peabody and Sherman. Sherman is Mr. Peabody’s little boy…yes…you heard me right…a dog is a little boy’s father. I will guide you thru these simple step by step drawing tutorial with simple geometric shapes, letters, and numbers.
You Might Also Enjoy Our Other Mr. Peabody and Sherman Lessons
How to Draw Sherman from Mr. Peabody and Sherman in Easy Steps Tutorial
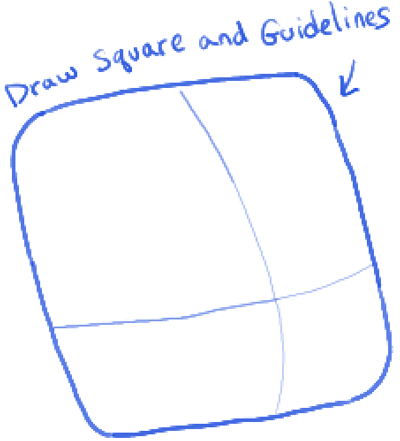
Step 1
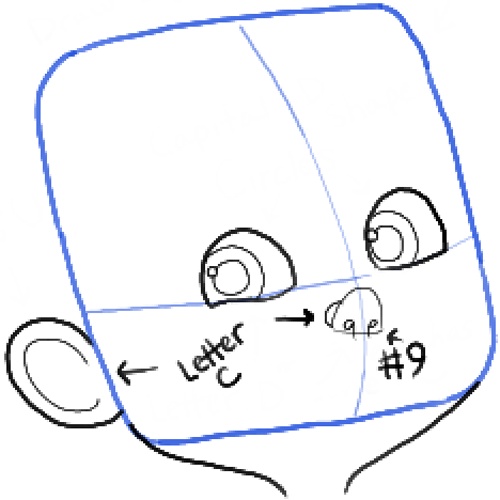
– Draw a rounded square for the face. Draw guidelines thru the face.
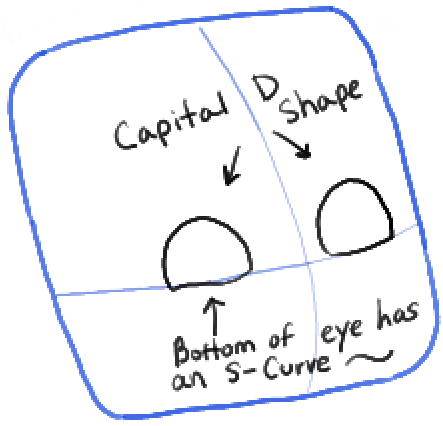
Step 2
– Draw sideways capital letter ‘D’ shapes for the eyes. The left eye’s bottom has a slight letter ‘s’ curve.
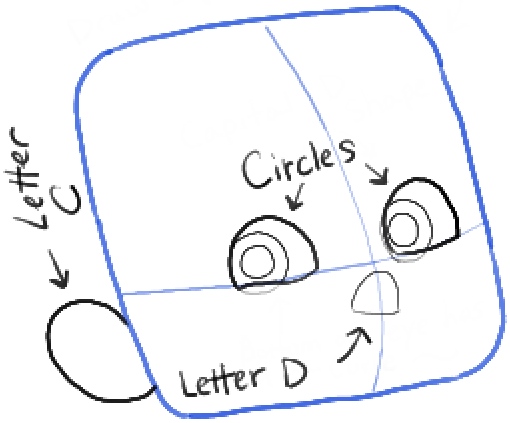
Step 3
– Draw circles in each eye.
– Draw a sideways letter ‘D’ nose.
– Draw a letter ‘c’ shape for the left ear.
Step 4
– Draw a letter ‘c’ shape in the left ear.
– Draw a circle in each eye – for the highlights.
– Draw #9-like shapes for the nostrils.
– Draw a letter ‘c’ shape on the left side of the nose.
Step 5
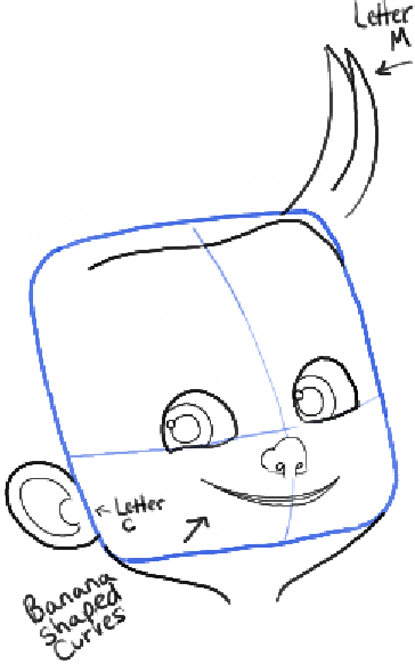
– Draw a letter ‘M’ shape for the hair at the top of his head.
– Draw banana-shaped curves for the mouth.
– Draw a letter ‘c’ shape inside the bigger inner ‘c’ shape for the inner ear shape.
– Draw curved lines for the neck.
– Draw curved lines for the bangs.
Step 6
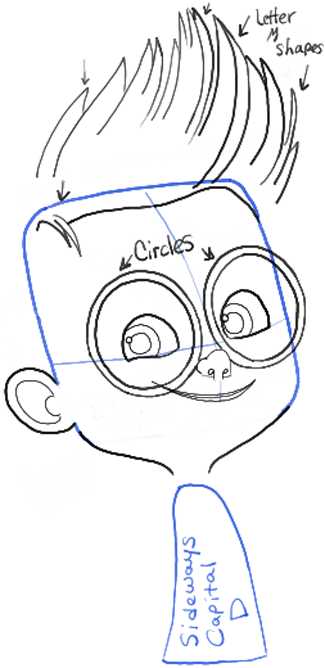
– Draw letter ‘M’ shaped hair strands.
– Draw circles for eye glasses.
– Draw a sideways capital letter ‘D’ shaped body.
Step 7
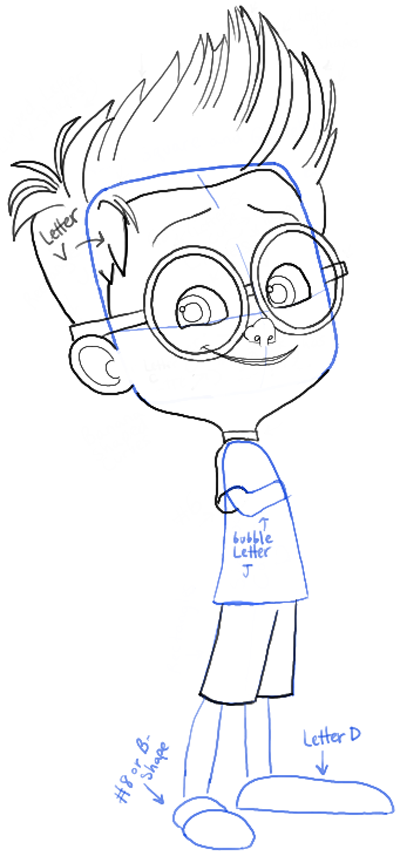
– Draw curved letter ‘v’ shapes for the hair at the back of his head.
– Draw a rectangle at the top of his shirt and for his legs / shorts. Draw rectangles on his glasses as well.
– Draw a #6-shaped arm.
– Draw eye brows.
Step 8
– Draw letter ‘v’ shapes in his hair.
– Draw bubble letter ‘j’ shape for arm.
– Draw #8 shaped left foot and a capital letter ‘D’ shape right foot.
Step 9
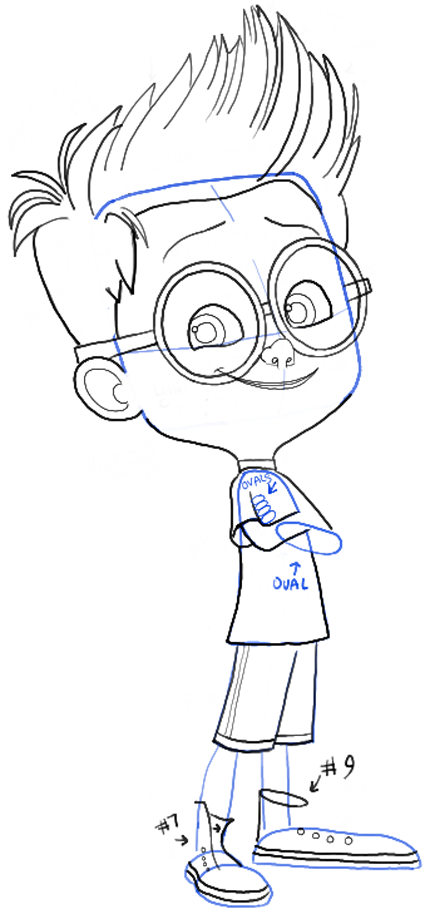
– Draw ovals for fingers and for the right arm.
– Draw some details in the shorts.
– Draw #7-like shapes in the left shoe. Draw some curved lines in it and circles.
– Draw a backwards #9-like shape in the right short. Draw curved lines and circles as well.
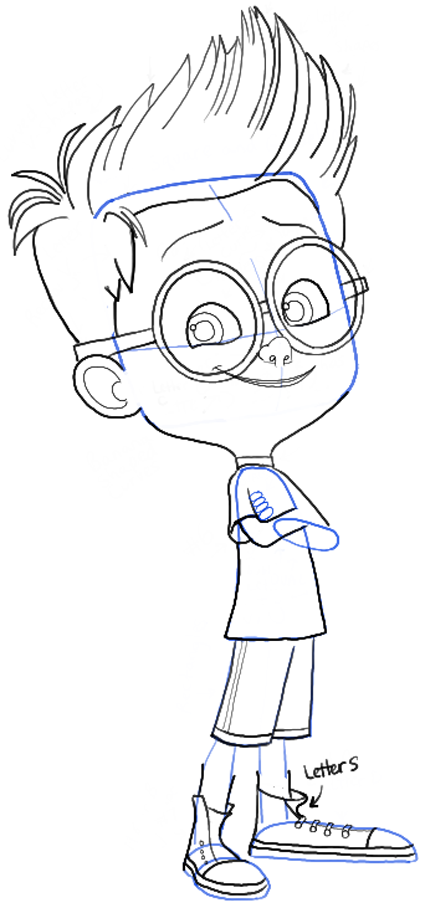
Step 10
– Add more details to the shoes.
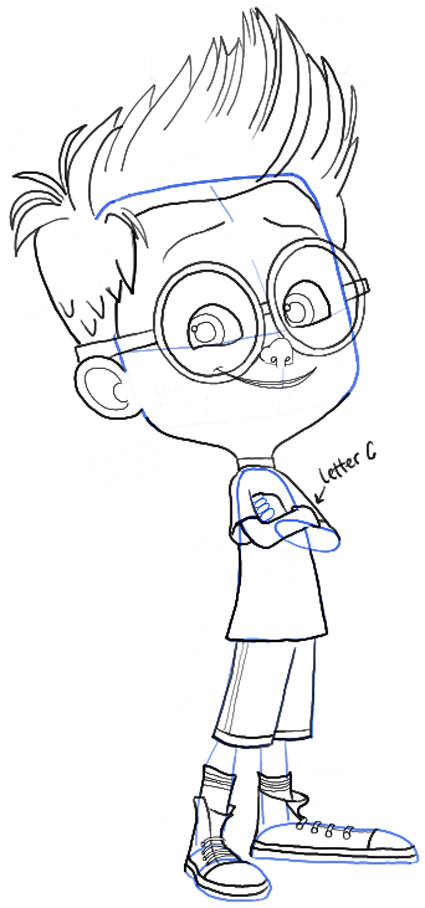
Step 11
– Finish the left hand with a letter ‘c’ shape.
– Finish up the shoes.
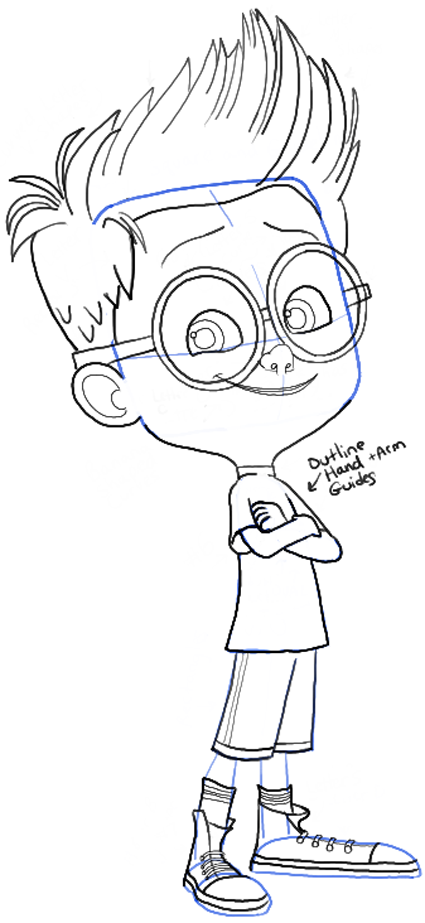
Step 12
– Outline hand and arm guides.
Finished Drawing of Sherman
Finish Sherman’s eye brows. Erase any guidelines that are left. Darken or blacken any lines that seem to need some work. And there you have it… a great picture of Sherman from Mr. Peabody and Sherman. I hope that you enjoyed this tutorial and that it helped you! Come back for more tutorials soon!
You Might Also Enjoy Our Other Mr. Peabody and Sherman Lessons


Information
This article was written on 19 Mar 2014, and is filled under Mr. Peabody and Sherman.
Current post is tagged
mr. peabody and sherman, sherman