
How to Draw Lego Luke Skywalker in Easy Steps Drawing Tutorial
Today I will show you how to draw Lego Luke Skywalker. I will use this simple step by step drawing lesson to guide you to drawing a perfect Lego Luke Mini Figure. The easy tutorial is as follows:
You Might Enjoy Our Other Lego Drawing Lessons
You Might Enjoy Our Other Star Wars Lessons
How to Draw Lego Luke Skywalker in Easy Steps Drawing Tutorial

Step 1

– Draw an oval…2 lines…and then a curved line at the top. This creates a cylinder-like shape.
Step 2

– Draw guidelines thru the face.
– Draw a circle for each eye.
– Draw a downwards curved line for the mouth.
– Draw an oval within the oval.
Step 3
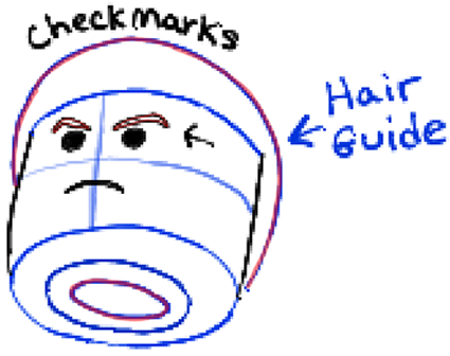
– Draw an oval within the last oval.
– Draw a hair guidelines.
– Draw check mark eye brows.
Step 4
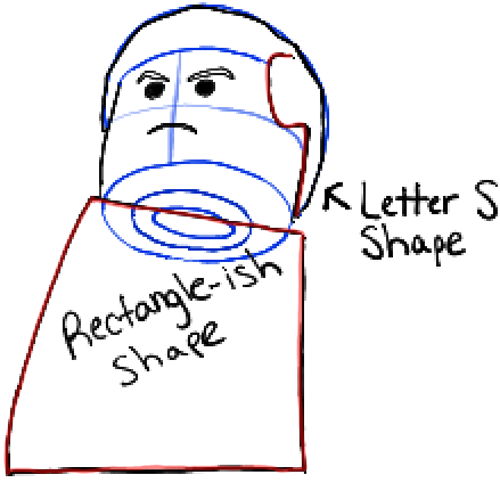
– Draw a letter ‘s’ shaped hair line. Outline the hair guide.
– Draw a rectangle-like shape for the body.
Step 5
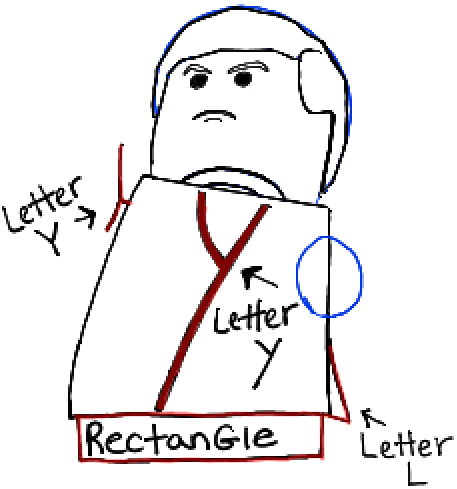
– Draw 2 letter ‘Y’ shapes…and a letter ‘L’ shape.
– Draw an oval on the right side of the body.
– Draw a rectangle under the body.
Step 6

– Draw a letter ‘Y’ shape in the collar area.
– Draw a backwards #9-like shape for the left arm.
– Draw a sideways letter ‘H’ shape for the right arm.
– Draw squares in the belt area.
– Draw curved lines in the thigh area…as well as 2 ovals.
Step 7
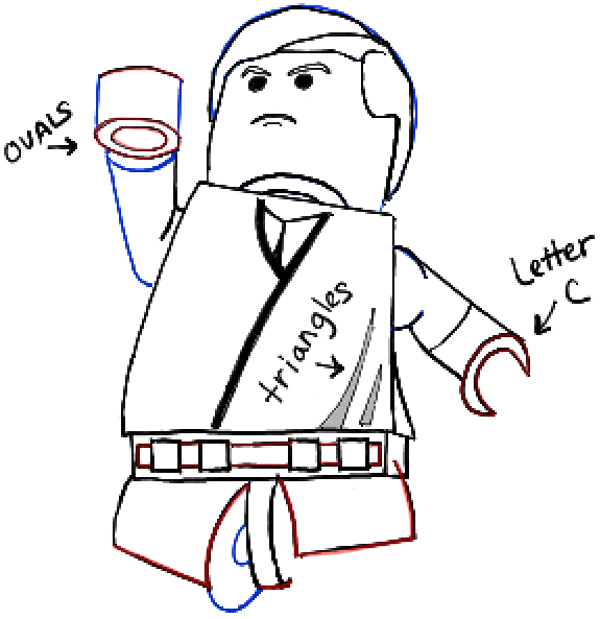
– Draw ovals … 2 lines … and a curved line … like a cylinder again.
– Draw triangle-like shadows in the shirt.
– Draw a bubble letter ‘C’ shape for the right hand.
– Draw lines in the belt area.
– Draw curved lines and lines in the thigh area.
Step 8
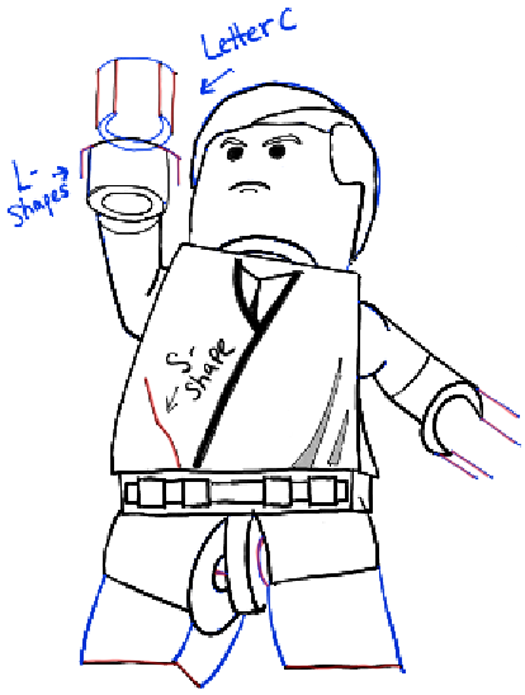
– Draw letter ‘L’ shapes on the left hand … a bubble letter ‘C’ – like shape…lines and a curved lines at the top.
– Draw lines on the right hand.
– Draw a letter ‘s’ shape curve in the shirt.
– Draw more to the legs.
Step 9
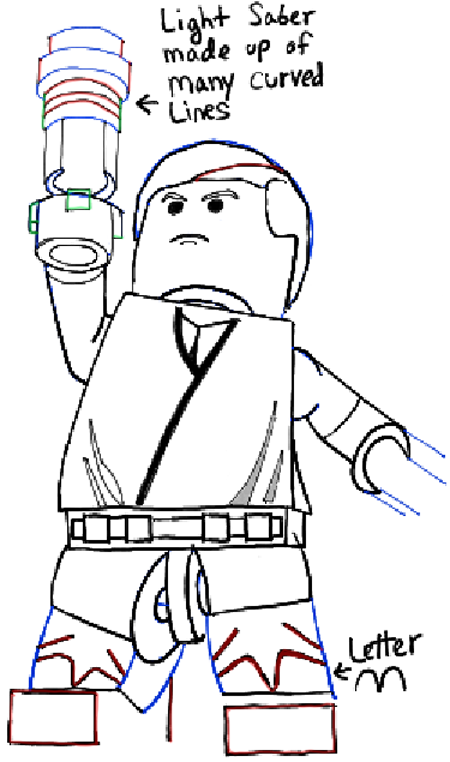
– Add more to the light saber.
– Draw letter ‘m’ and line shapes in the legs.
– Draw a rectangle for the front of the feet.
Step 10
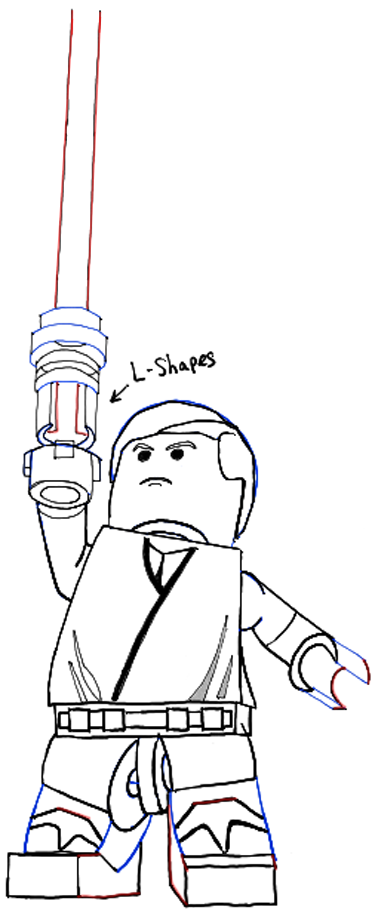
– Draw 2 long lines for the light saber. Draw letter ‘L’ shapes within the base of it.
– Finish the right hand.
– Finish the feet…and legs.
Step 11
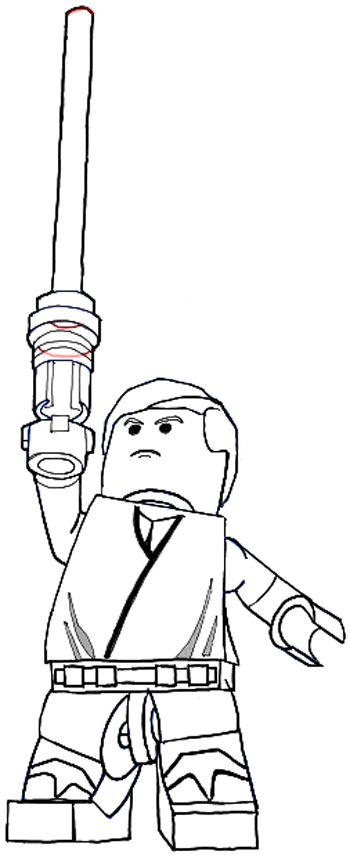
– Finish drawing the light saber.
Finished Drawing of Lego Luke Skywalker
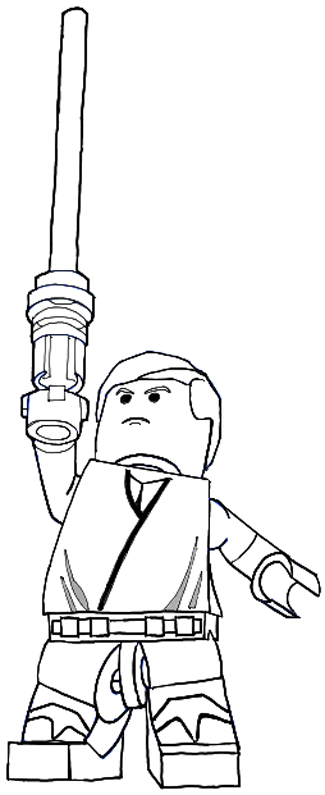
– Erase the guidelines and darken any remaining lines.
I hope that this drawing lesson helped you and that your Lego Luke Skywalker turned out really well. Come back soon for more drawing tutorials!
You Might Enjoy Our Other Lego Drawing Lessons
You Might Enjoy Our Other Star Wars Lessons
One Comment
Leave a Reply
Information
This article was written on 13 May 2014, and is filled under Lego Minifigures, Star Wars Saga.
Current post is tagged
Lego Luke, Lego Luke Sykwalker, lego minifigures, lego star wars, luke skywalker, star wars
Cute drawing tutorial. 😉